Code Formatting and Linting in Ruby and JavaScript :: Full-stack web development "Hello World" tutorials for entrepreneurs: Part 9 of 10

This post is part 9 of a 10-part series within a series that is designed to teach full-stack web development for entrepreneurs. Here we’ll dive into the topics of automated code formatting and linting to maintain consistent code styles and help us catch bugs before they get committed to our code repository.
Linting
Wikipedia says it well. A linter is “a tool that analyzes source code to flag programming errors, bugs, stylistic errors, and suspicious constructs.” This helps tremendously to not only write better code faster, but it makes life easier for teams to stay on the same page and commit readable/reliable code.
Since we’ll be using Ruby for our primary “back-end” language (server side), our linter of choice there will be Rubocop. For our JavaScript, we’ll leverage ESLint. In addition, since JavaScript can be written a zillion different ways, we’ll start cleaning up our code first with Prettier before we run ESLint.
There are many great reasons to use both a style editor like Prettier alongside a more classic linter like ESLint. For a full explanation, see this article, but the short version is that it speeds up development time for teams and helps beginners learn how to write better JavaScript. Since this is a training course for new developers, leveraging Rubocop, ESLint, and Prettier will help tremendously.
In fact, I've been writing code for decades and still learn new and helpful things with linters (along with corrections for all my bad code style habits, of course!).
So, to get started let’s install Rubocop.
To do so, open up Gemfile and at the bottom add:
gem 'rubocop', require: falseSave the file. In your terminal at the quotesapp root, run:
- bundle install
Now, to get a sense for how rubocop works across the board, let’s go ahead and run:
- rubocop
All this does is tell you how many “offenses” there are in your code. You’ll see something like “51 files inspected, 238 offenses detected, 222 offenses auto-correctable”. Most libraries/gems out there - such as Rails - don’t obey Rubocop all the time (their performance and readability would likely increase if they did!). So when you first run Rubocop on a project it will complain about lots of things. This is ok :)
Let’s go ahead and run an autocorrect. This will “clean up” a lot of default Rails files and anything we may have written sub-optimally along the way ourselves.
- rubocop -a
You’ll then see something like “51 files inspected, 255 offenses detected, 183 offenses corrected, 57 more offenses can be corrected with `rubocop -A`”
So it’s indeed go ahead and run the more aggressive version:
- rubocop -A
Now we’ll see “51 files inspected, 126 offenses detected, 111 offenses corrected”
OK - so for our remaining “offenses” that we’ll need to manually address, let’s go ahead and run again:
- rubocop
This reveals that we have 15 offenses to address, where the first set are related to
documenting classes, which will be good for us as a training course:

Rubocop doesn’t mess around. It wants us to make sure to add some comments to help describe what our classes/models are. This will help us be better team players and write better code.
To help make this easy - and to assist with development down the road - we’re going to use the Annotate gem that will automatically describe the columns of our models.
In your Gemfile, add in the development group on line 42 the annotate gem:

And we’ll go ahead and run in our terminal:
- bundle install
- rails g annotate:install
- rails db:migrate:reset
- rubocop -A
- rubocop
Now let’s go tweak our files to make Rubocop happy. For all these documentation comments, make sure to leave a blank line after any of the “# frozen_string_literal: true” lines and add your comment right above the “class [x]” line.
In app/channels/application_cable/connection.rb we’ll add a new line 4 (right above “class Connection”) add:
# Top-level methods for web socket connectionsIn app/channels/hello_quotes_channel.rb we’ll add a blank line 2 and on line 3 write:
# Web socket channel for our example appIn app/controllers/api/v1/quotes_controller.rb we’ll add on a new line 5:
# Quotes API controller for our example appIn app/controllers/welcome_controller.rb:
# For our home page and public-facing marketing pages, terms, privacy, etc…In app/helpers/application_helper.rb:
# For top level view helper methodsIn app/models/application_record.rb:
# Constants and methods for all modelsIn app/reflexes/quotes_reflex.rb:
# Reflex methods for our example appIn config/application.rb on a new line 12:
# Top-level configuration for our Rails appAnd finally, in our db/migrate folder, in our “create_quotes.rb” migration file, which will have a unique file name for your app since it is time-stamped to when you created it, let’s add:
# Notable things people sayThat will do it for our commenting clean-ups, which is also helpful for instruction. Now, run “rubocop -A” again and you’ll see there are a bunch of offenses in bin/bundle. Since that is a default Rails file we didn’t write, let’s go ahead and tell Rubocop to ignore it.
Open the file and on line 10 add:
# rubocop:disable all and at the bottom add
# rubocop:enable all Run “rubocop -A” again and now you’ll see two offenses left:

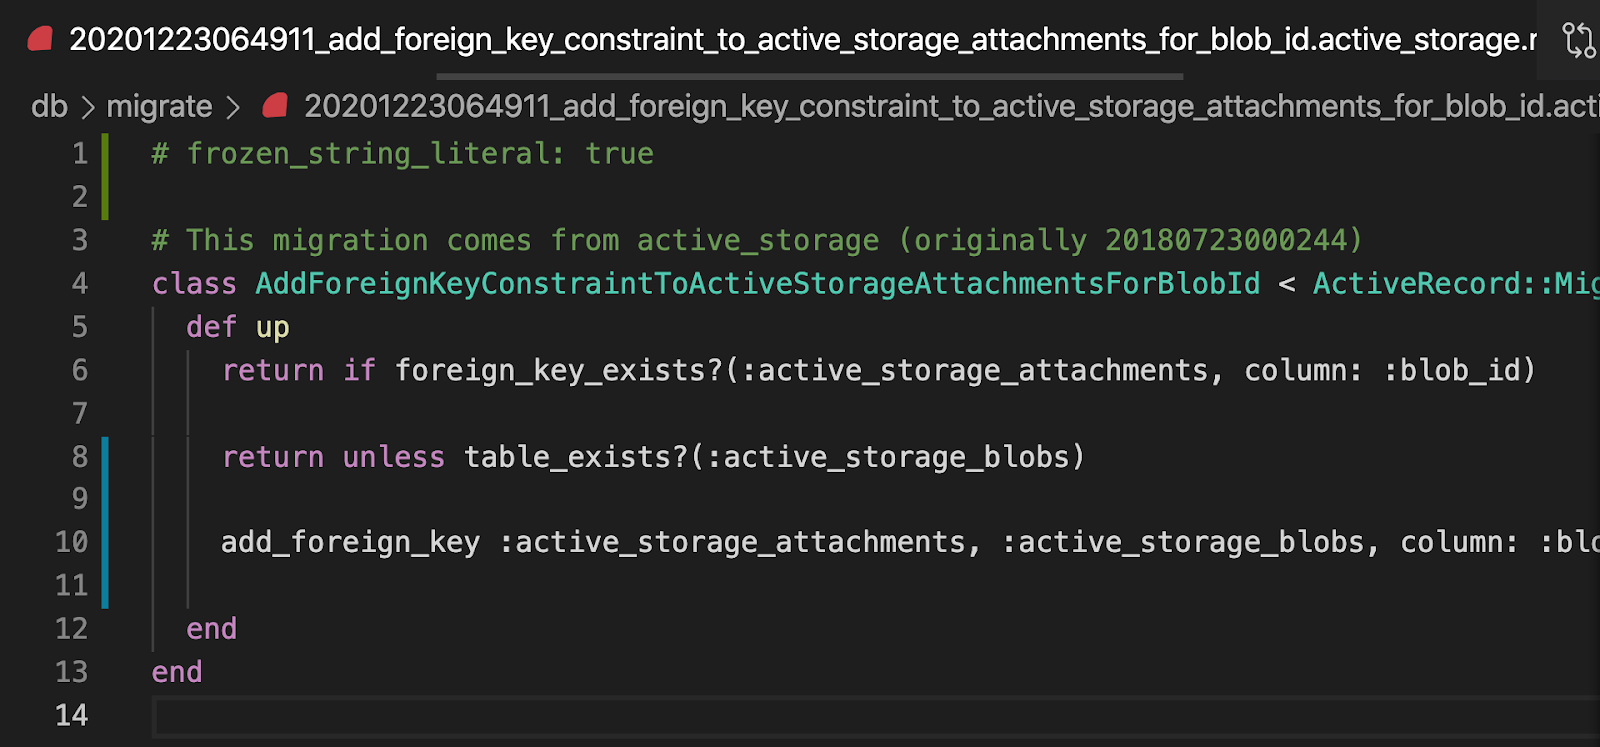
For the first one, we can open that file in our db/migrate folder and rewrite - per the suggestion on Lines 8-11 - to:
And finally, in lib/tasks/auto_annotate_models.rake we’ll go ahead and make line 8 read:
task :set_annotation_options do # rubocop:disable Metrics/BlockLengthAs you can see, in real life there are times when we need to tell Rubocop to chill out a little. But this should be the exception, not the norm. A good example of when to tell Rubocop to look the other way is when a rule (aka “Cop”) like Metrics/BlockLength is not followed because a large number of key/value pairs are being set in a configuration. We’ll encounter many of these along the way so you’ll get a sense for when it’s ok to tell Rubocop to ignore something. We’re still the boss of the ol’ cop, and ultimately we’re thankful that it is extremely picky. It helps us write better code. :)
Now go ahead and run a final “rubocop -A” in your terminal and then run “rubocop” and you should see “no offenses detected”:

Now, since we blew away our database above, let’s go ahead and “rails c” to open up our rails console and then enter:
Quote.create(content: "Hello World", author_name: "Abe Lincoln")
...then “rails s” to fire up your Rails server and check http://localhost:3000 in your browser that your app is still working correctly after all our Rubocop changes.
Assuming everything looks good, do a quick review of all your code changes (which should look like this mega commit) and let’s go ahead:
- git add .
- git commit -a -m "Rubocop cleanups"
- git push
Prettier and ESLint
Now that we have Rubocop linting under our belts, next we are going to reformat our JavaScript with Prettier (technically a style fixer / code formatter) before we run ESLint to lint our JavaScript code.
Get started by installing prettier by running this at your quotesapp root in your terminal:
- yarn add --dev --exact prettier
- echo {}> .prettierrc.json
- touch .prettierignore
And then let’s go ahead and open up our “.prettierignore” file in VSC and add:
tmp/
public/packs/
And then save the file. Adding these folders in “.prettierignore” will tell prettier to not reformat code there since temp files and buildpacks are purposely formatted in such a way to not be read by humans.
Next, go ahead and run prettier with:
- yarn prettier --write .
You’ll see the output check a bunch of files. The more greyed out ones are the files that didn’t get modified. Go ahead and examine the changes it made in VSC’s diff viewer.
Now let’s get ESLint setup
- yarn add --dev eslint-config-prettier
- yarn add eslint --dev
- yarn add babel-eslint --dev
- yarn add eslint-plugin-react --dev
- touch .eslintrc.json
Open up your .eslintrc.json file and add in:
{
  "env": {
    "browser": true,
    "node": true,
    "commonjs": true,
    "es2021": true
  },
  "extends": [
    "eslint:recommended",
    "plugin:react/recommended",
    "prettier"
  ],
  "parserOptions": {
    "ecmaVersion": 12
  },
  "rules": {
  }
}
This sets up our ESlint config to let the linter know we are expecting our JavaScript to use modern conventions, and play nice with react and prettier.
Save the file and then:
- touch .eslintignore
...and open up that file to add these folders similar to our prettier ignore:
tmp/
public/packs/
Save the file and then let’s go ahead and run eslint:
- yarn run eslint .
And we’ll see:
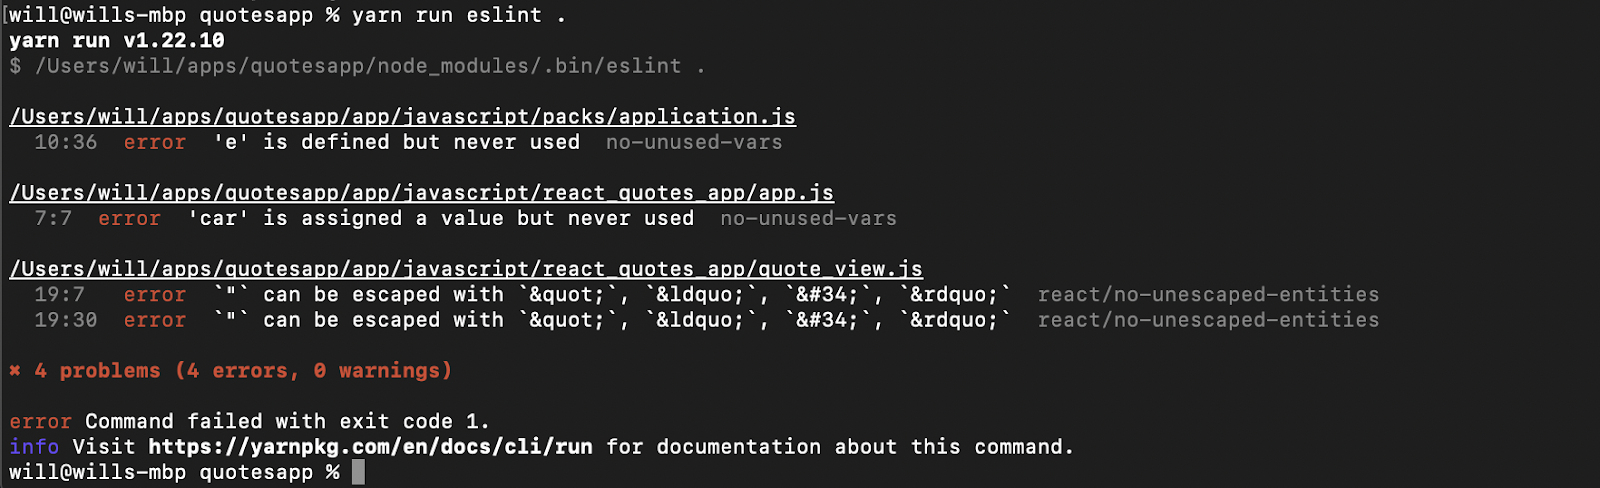
For the first error, let’s go ahead and open up app/javascript/packs/application.js and remove the “e” from line 10 so it now reads:
window.document.onload = function () {For the second error, let’s open up app/javascript/react_quotes_app/app.js and change line 7 to just be:
cablecar.connect(store, "HelloQuotesChannel");
Indeed ESLint is correct that we didn’t need that car variable defined since we didn’t use it. This helps save a bit of memory to make the app more performant (these things can add up at scale, so you can see why using a linter can be helpful).
And finally, open up app/javascript/react_quotes_app/quote_view.js and we’ll change line 19 to:
"{quote.get("content")}" - {quote.get("author_name")}FYI, you can read some examples here why putting the escaped HTML character in the React code meant to be displayed in a browser is better than manually putting in the quote character. In short, it helps catch common bugs when writing React components.
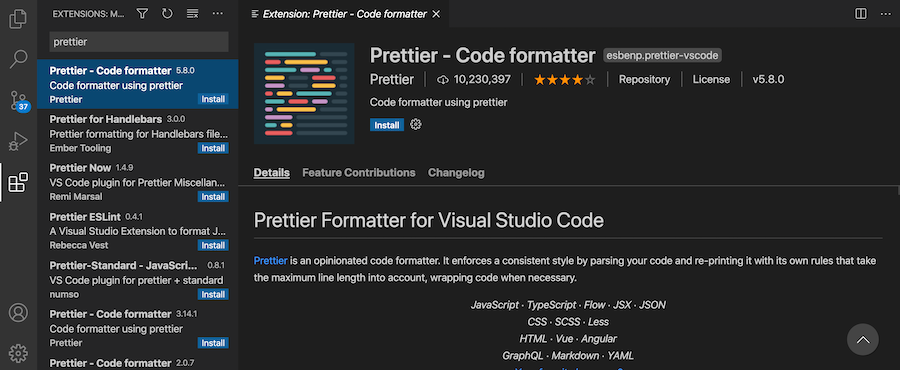
Finally, let’s go ahead and install the Prettier and ESLint extensions in our VSCode so they will run automatically when we write JavaScript and save files. Search for them in your extensions tab and click “install”:

Finally, fire up your rails server again (“rails s”) and double check that your application still works as expected.
Assuming it does, then check your code changes, which should look like this commit, and then:
- git add .
- git commit -a -m "Prettier and ESLint cleanups"
- git push
And that’s it for now! As we write code along the way, VSC will help us write better code as we save files, and we’ll be sure to manually run Prettier, ESLint, and Rubocop before we make commits to ensure our code quality is as solid as possible.